
I. Introduction
A fresh coat of paint has the power to transform the look and feel of your home’s interior, breathing new life into your living spaces. Whether you’re planning to update a room’s color, cover up imperfections, or just want to give your home a makeover, interior painting is a popular DIY project that can yield stunning results.
But here’s the twist – have you considered using a paint sprayer for your next interior painting project? If you haven’t, you’re in for a treat. Paint sprayers offer several advantages over traditional brushes and rollers, including a faster application process, smoother finishes, and more even coverage.
In this comprehensive guide, we will delve into the art of “Interior Painting with a Sprayer.” Whether you’re a novice looking to explore the world of DIY painting or an experienced painter seeking to enhance your skills, this blog post is packed with tips, techniques, and insights that will help you achieve professional-looking results.
We’ll start by covering the basics of interior painting, from choosing the right paint to preparing your room and selecting the appropriate tools. Then, we’ll guide you through the process of getting your sprayer ready and provide step-by-step instructions on how to paint like a pro. Along the way, we’ll discuss maintenance and troubleshooting, offer expert tips for a flawless finish, and wrap up with essential cleanup and safety measures.
By the end of this guide, you’ll be equipped with the knowledge and confidence to take on your interior painting project with a sprayer, allowing you to transform your living spaces into the dream oasis you’ve always envisioned. So, let’s dive in and discover the art of interior painting with a sprayer!
II. Understanding Interior Painting Basics
Before you start your interior painting project with a sprayer, it’s essential to grasp the fundamentals of interior painting. This section will serve as your foundation, covering everything from choosing the right paint to preparing your room and selecting the appropriate tools.
A. Choosing the Right Paint
- Paint Type: The first decision you’ll need to make is selecting the type of paint. Common options include latex (water-based) and oil-based paints. Latex paints are often preferred for interior projects due to their ease of use, quick drying time, and low odor.
- Finish: Paint finishes come in various options, such as flat, satin, semi-gloss, and high-gloss. The finish you choose will affect the appearance and durability of the paint. Flat finishes hide imperfections but are less washable, while glossier finishes are more durable and easier to clean.
- Color Selection: Picking the right color is crucial to achieving your desired interior aesthetic. Consider factors like room size, lighting, and the mood you want to create. It’s also a good idea to test paint samples on your walls to see how they look in your specific space.
B. Preparing the Room
- Clearing the Space: Begin by removing furniture, fixtures, and decorations from the room. Emptying the space will not only make painting easier but also protect your belongings from paint splatter.
- Protecting Surfaces and Furniture: Cover floors with drop cloths or plastic sheets to prevent paint from seeping through. Use painter’s tape to mask off areas like baseboards, trim, and windows.
- Patching and Repairing Walls: Inspect the walls for any cracks, holes, or imperfections. Patch these areas with spackling compound and sand them smooth once dry. This step ensures a flawless paint job.
C. Selecting the Appropriate Tools
- Types of Paint Sprayers: There are different types of paint sprayers, including airless, HVLP (High-Volume, Low-Pressure), and handheld models. Each has its strengths and ideal use cases. Research and select the one that suits your project best.
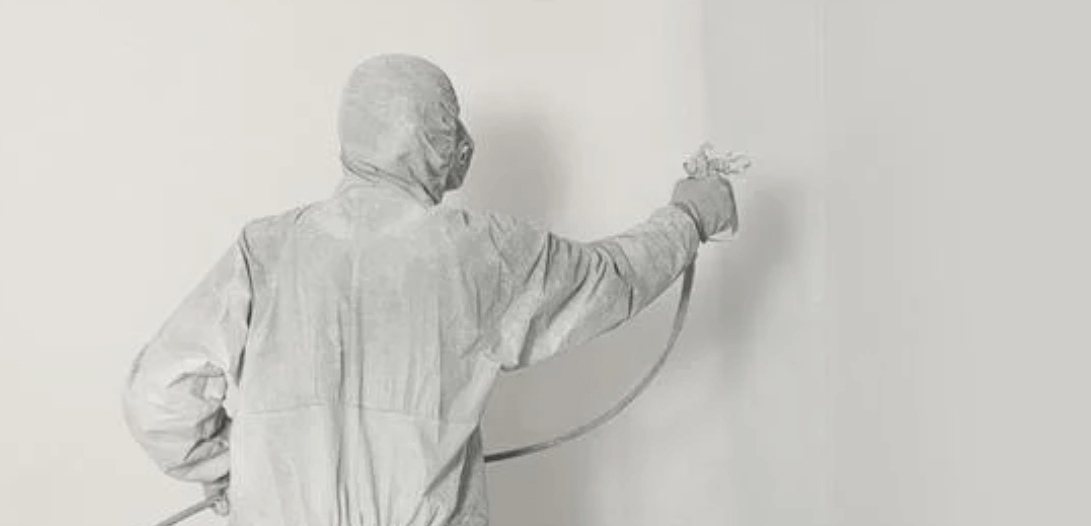
- Safety Equipment: When working with a paint sprayer, safety is paramount. Ensure you have the following safety gear:
- Respirator mask to protect against paint fumes
- Safety goggles or glasses to shield your eyes from overspray
- Disposable coveralls or old clothing to shield your body
- Gloves to protect your hands from paint and chemicals
Understanding these interior painting basics will set the stage for a successful project. With the right paint, a well-prepared room, and the appropriate tools, you’re ready to move on to the next steps of interior painting with a sprayer.

III. Getting Your Sprayer Ready
Now that you have a solid understanding of interior painting basics, it’s time to get your paint sprayer ready for action. Properly preparing your sprayer is essential to ensure smooth operation and a flawless paint job. In this section, we’ll walk you through the steps to assemble, inspect, and set up your sprayer for optimal performance.
A. Assembling and Inspecting the Sprayer
- Read the Manual: Start by carefully reading the manufacturer’s manual that comes with your paint sprayer. This will provide specific instructions and safety guidelines tailored to your equipment.
- Assemble the Sprayer: Follow the manual’s instructions to assemble your sprayer. This typically involves attaching components like the spray gun, hose, and nozzle. Ensure all connections are tight and secure.
- Inspect for Damage: Thoroughly inspect the sprayer for any signs of damage or wear. Pay attention to the hoses, seals, and the spray gun itself. Any damaged components should be replaced before use to prevent leaks or malfunctions.
B. Diluting the Paint If Necessary
- Check Paint Consistency: Some paints may need to be thinned or diluted to achieve the right viscosity for spraying. Refer to the paint manufacturer’s instructions on the paint can for guidance on whether thinning is required.
- Use the Correct Thinning Agent: If thinning is necessary, use the recommended thinner or water for the specific type of paint you’re using. Avoid over-thinning, as it can affect the paint’s performance and finish.
C. Adjusting Spray Settings for the Project
- Choose the Right Nozzle: Paint sprayers typically come with various nozzle sizes. Select the nozzle that suits the type of paint you’re using and the desired spray pattern. A larger nozzle may be needed for thicker paints.
- Adjust Spray Pressure: Most sprayers allow you to control the spray pressure. Lower pressure is ideal for detailed work, while higher pressure is better for large, even surfaces. Adjust the pressure according to your project’s needs.
- Practice on a Scrap Surface: Before diving into your main project, practice spraying on a scrap surface. This helps you become familiar with the sprayer’s settings and ensures that it’s functioning correctly.
Getting your sprayer ready may seem like a meticulous process, but it’s a crucial step to ensure a smooth and hassle-free painting experience. Once your sprayer is properly assembled, inspected, and set up, you’re ready to move on to the exciting part – painting your interior space with ease and precision.
IV. Preparing for the Painting Process
Before you start painting your interior with a sprayer, it’s essential to make sure your workspace and environment are properly prepared. Taking the time to set up the right conditions will contribute to a successful and efficient painting experience. In this section, we’ll guide you through the necessary preparations to ensure your project goes smoothly.
A. Wearing Appropriate Safety Gear
- Respirator Mask: Begin by wearing a respirator mask designed for paint fumes. This protects you from inhaling harmful paint particles and fumes, ensuring your respiratory health.
- Safety Goggles: Protect your eyes from overspray and accidental splatters by wearing safety goggles or glasses.
- Disposable Coveralls: Put on disposable coveralls or wear old clothing that you don’t mind getting paint on. This will shield your body from paint splatters and drips.
- Gloves: Wear gloves to protect your hands from both the paint and any chemicals used for cleanup.
B. Setting Up Proper Ventilation
- Open Windows and Doors: Proper ventilation is crucial when working with paint. Open windows and doors to create cross-ventilation that helps dissipate paint fumes and ensures a healthier breathing environment.
- Use Fans and Ventilation Systems: If your workspace lacks natural ventilation, consider using fans and ventilation systems to circulate air and exhaust fumes to the outside.
C. Covering Floors and Surrounding Areas
- Lay Down Drop Cloths: Protect your floors by covering them with drop cloths or plastic sheets. This prevents paint from seeping through and damaging your flooring.
- Mask Off Areas: Use painter’s tape to mask off areas you don’t want to paint, such as baseboards, trim, and window frames. Ensure the tape is securely in place to prevent paint bleed.
- Remove or Cover Furniture: If possible, remove furniture from the room. If removal isn’t feasible, cover it with plastic sheets or old bed sheets to shield it from paint splatter.
D. Testing the Sprayer on a Scrap Surface
- Spray Test: Before you start painting your walls, conduct a test spray on a scrap piece of cardboard or wood. This helps you fine-tune the sprayer’s settings and get a feel for how it operates.
- Adjustments: Make any necessary adjustments to the spray pattern, pressure, and nozzle to ensure you achieve the desired results.
By taking these preparation steps, you create a safe and controlled environment for your interior painting project with a sprayer. Proper safety gear, ventilation, and surface protection are crucial elements that contribute to a successful painting experience and a professional finish. With your workspace ready, you’re now prepared to move on to the actual painting process.
V. The Painting Process
Now that your workspace is properly prepared and your sprayer is ready, it’s time to dive into the heart of your interior painting project. In this section, we will guide you through the essential steps of the painting process using a sprayer. With the right techniques, you can achieve even coverage and a professional finish.
A. Proper Spraying Techniques
- Distance and Angle: Maintain a consistent distance between the sprayer and the wall, typically around 12 inches. Hold the sprayer at a right angle to the surface for even coverage. Adjust the distance and angle as needed for different areas and textures.
- Overlapping Strokes: Avoid starting and stopping mid-wall to prevent paint build-up. Instead, use overlapping strokes. Start each new pass slightly overlapping the previous one to ensure a smooth finish.
- Consistent Speed: Maintain a consistent, steady speed as you move the sprayer across the wall. This helps control the amount of paint applied and ensures uniform coverage.
B. Starting with a Primer Coat
- Primer Importance: Applying a primer coat is essential for achieving better paint adhesion, especially if you’re painting over a previously unpainted surface or making a significant color change.
- Thin Primer If Necessary: Some primers may require thinning. Follow the manufacturer’s instructions on the primer can for the correct thinning ratios.
- Apply Primer Evenly: Use the sprayer to apply an even coat of primer across the entire surface. Allow the primer to dry completely before proceeding to the paint coat.
C. Applying the Paint in Sections
- Divide the Room: To maintain control and achieve a consistent finish, divide the room into manageable sections. Start with one section and work your way methodically through the room.
- Overlap Sections: When moving from one section to another, overlap the edges slightly to ensure seamless blending between sections.
D. Dealing with Corners and Edges
- Corners and Edges: For corners, edges, and tight spots where the sprayer may not reach, use a brush or roller to paint these areas carefully. Be precise to avoid overspray on adjacent surfaces.
- Mask Off as Needed: Use painter’s tape and masking paper to protect adjacent surfaces while painting edges and corners.
Remember, practice makes perfect. Don’t be discouraged if your first passes with the sprayer aren’t flawless. It may take some time to become comfortable with the technique. Continue to adjust your sprayer settings as needed to achieve the desired coverage and finish.
By following these techniques and working methodically through the room, you’ll be well on your way to completing your interior painting project with a sprayer like a pro.
VI. Maintenance and Troubleshooting
While painting your interior with a sprayer can be efficient and yield professional results, it’s essential to take proper care of your equipment and address any issues that may arise during the project. In this section, we’ll discuss maintenance tips and troubleshooting techniques to keep your sprayer running smoothly.
A. Cleaning the Sprayer After Use
- Immediate Cleanup: After completing your painting project, clean the sprayer immediately to prevent paint from drying and clogging the system.
- Disconnect and Drain: Disconnect the sprayer from the power source and drain any remaining paint from the system. Follow the manufacturer’s instructions for safe disassembly.
- Flush with Cleaning Solution: Use an appropriate cleaning solution recommended by the sprayer’s manufacturer to flush the system thoroughly. Run the cleaning solution through the sprayer until the liquid runs clear.
- Clean Individual Components: Take apart the nozzle, hose, and other components for a more thorough cleaning. Remove any paint residue or debris.
- Inspect Seals and Gaskets: Check the seals and gaskets for wear or damage. Replace any worn or damaged parts to prevent leaks.
- Lubrication: Some sprayers may require lubrication of specific parts. Refer to the user manual for guidance on lubrication if necessary.
B. Handling Clogs and Blockages
- Identify the Problem: If you encounter a clog or blockage during painting, stop immediately. Turn off the sprayer and release pressure. Identify the location of the blockage.
- Clear the Blockage: Use a cleaning rod or wire to gently clear the clog from the nozzle or spray tip. Avoid using excessive force, as it can damage the sprayer components.
- Inspect Paint Consistency: Sometimes, clogs occur due to improperly thinned or contaminated paint. Ensure your paint is at the correct consistency and free from impurities.
- Adjust Settings: If clogging is a recurring issue, consider adjusting your sprayer’s settings, such as pressure or nozzle size, to better suit the paint you’re using.
C. Storing the Sprayer Properly
- Empty Paint Containers: If there is any paint left in the sprayer, empty it and clean the container thoroughly.
- Lubricate Moving Parts: If recommended by the manufacturer, apply lubrication to moving parts to prevent corrosion and ensure they function correctly during the next use.
- Store in a Cool, Dry Place: Store your sprayer in a cool, dry place away from direct sunlight and extreme temperatures. Avoid freezing conditions, which can damage internal components.
- Protect Hoses and Cords: Coil hoses and power cords neatly to prevent kinks and damage. Store them separately from the sprayer.
- Regular Maintenance Checks: Periodically inspect your sprayer even when not in use. Look for any signs of wear, damage, or corrosion.
Proper maintenance and addressing any issues promptly will extend the life of your sprayer and ensure it performs optimally for future projects. Remember that regular cleaning and care can save you time and money in the long run.
VII. Tips for a Professional Finish
Achieving a professional finish when painting your interior with a sprayer requires attention to detail and the right techniques. In this section, we’ll share valuable tips to help you attain a flawless and polished result that will leave your interior looking stunning.
A. Achieving Even Coverage
- Overlap Strokes: As mentioned earlier, overlapping your spray strokes is crucial to avoid uneven coverage. Make sure each pass slightly overlaps the previous one for a consistent finish.
- Maintain a Consistent Distance: Keep a consistent distance between the sprayer and the wall throughout the project to prevent variations in paint thickness.
- Back Roll or Back Brush: After spraying, consider back rolling or back brushing the paint with a roller or brush. This technique helps spread the paint evenly and remove any potential streaks or lines.
B. Avoiding Drips and Streaks
- Use Proper Pressure: Adjust the spray pressure to a level that prevents excessive paint buildup, which can lead to drips. High pressure can cause overspray, while low pressure may result in uneven coverage.
- Practice with Test Panels: If you’re new to using a sprayer, practice on test panels or scrap surfaces to get a feel for the equipment and reduce the risk of drips or streaks on your walls.
- Check Nozzle Condition: Ensure the nozzle is clean and in good condition. A damaged or clogged nozzle can lead to uneven paint application.
C. Maintaining a Consistent Color
- Mix Paint Thoroughly: Before pouring paint into the sprayer, stir it thoroughly to ensure color consistency. Periodically remix the paint to prevent settling.
- Use the Same Paint Batch: If you need more than one can of paint for your project, try to use paint from the same batch to minimize variations in color.
D. Paying Attention to Drying Times
- Follow Drying Guidelines: Observe the recommended drying times between coats as indicated on the paint can. Rushing through the project can lead to smudging or uneven results.
- Inspect for Imperfections: After each coat has dried, inspect the walls for imperfections. Sand and touch up any areas that require attention before applying additional coats.
- Patience Is Key: Achieving a professional finish often requires patience. Don’t rush the process, and allow ample drying time between coats for the best results.
E. Use High-Quality Paint and Materials
- Invest in Quality Paint: Higher-quality paint tends to have better coverage, durability, and color retention. While it may be more expensive upfront, it can save you time and money in the long run.
- Choose the Right Tools: Ensure you’re using high-quality brushes, rollers, and spray tips that are suitable for your project and paint type.
By incorporating these tips into your interior painting with a sprayer, you’ll greatly enhance your chances of achieving a professional finish that’s both aesthetically pleasing and long-lasting. Attention to detail, practice, and patience will be your allies in creating a beautifully painted interior.
VIII. Post-Painting Cleanup
Once you’ve successfully completed your interior painting project with a sprayer and achieved the professional finish you desired, it’s time to wrap things up with a thorough cleanup. Proper cleanup not only maintains the condition of your tools but also ensures a safe and tidy environment. Here’s a step-by-step guide to post-painting cleanup:
A. Removing Masking Tape and Covers
- Remove Painter’s Tape: Carefully peel off the painter’s tape from trim, baseboards, and any masked-off areas. Pull the tape away slowly at a slight angle to avoid damaging the paint.
- Inspect for Seepage: Check for any paint seepage or bleeding under the tape. If you find any, use a small brush or touch-up roller to correct it.
- Dispose of Tape and Covers: Discard used painter’s tape and plastic covers in a trash bag. Be cautious not to let paint-covered tape or plastic come into contact with other surfaces.
B. Cleaning Up the Workspace
- Collect Drop Cloths: Gather and shake out any drop cloths or plastic sheets you used to protect the floor. Fold them neatly for storage or washing.
- Remove Furniture Covers: If you covered furniture, remove the protective covers and shake them out. Check the furniture for any paint splatters and clean them as needed.
- Vacuum and Dust: Vacuum the room to pick up any loose paint chips or dust. Dust all surfaces to remove any remaining debris.
C. Properly Disposing of Paint and Materials
- Dispose of Paint Containers: If you have leftover paint in the sprayer’s container, pour it back into the original paint can, or a sealable container for future use. Seal the container tightly.
- Recycle or Dispose: Depending on local regulations, dispose of paint cans and containers properly. In some areas, you may be able to recycle empty paint cans, while others may require you to dispose of them as hazardous waste. Check with your local authorities for guidance.
D. Cleaning the Sprayer and Tools
- Clean the Sprayer: Refer to the manufacturer’s cleaning instructions for your specific sprayer model. Thoroughly clean the sprayer, hoses, and nozzle using the recommended cleaning solution.
- Rinse Brushes and Rollers: If you used brushes or rollers for edge work or touch-ups, rinse them thoroughly with water if using latex paint or the appropriate solvent if using oil-based paint.
- Dispose of Cleaning Materials: Properly dispose of cleaning materials, such as rags and paper towels, that have come into contact with paint or solvents. Follow local regulations for hazardous waste disposal.
E. Final Inspection
- Inspect the Room: Take a final look around the room to ensure everything is clean and tidy. Check for any missed touch-ups or imperfections in the paint.
- Reinstall Hardware: If you removed switch plates, outlet covers, or hardware, reinstall them once the paint has dried completely.
By following these post-painting cleanup steps, you’ll not only maintain the longevity of your tools but also leave your workspace clean and safe. Proper disposal of paint and materials is essential for environmental responsibility, so be sure to adhere to local guidelines and regulations. With the cleanup complete, you can now fully enjoy and appreciate your freshly painted interior.
IX. Final Thoughts
Congratulations! You’ve successfully navigated the world of interior painting with a sprayer and transformed your living spaces into a beautiful and professionally finished masterpiece. As you wrap up your project, take a moment to reflect on your accomplishments and consider a few final thoughts that can help you conclude your painting journey on a high note.
A. Benefits of Using a Sprayer for Interior Painting
- Efficiency: A paint sprayer can significantly reduce painting time, allowing you to complete your project much faster than with traditional brushes and rollers.
- Professional Results: With the right techniques and practice, a sprayer can achieve a smooth, even finish that rivals the work of professional painters.
- Uniform Coverage: Sprayers excel at providing consistent coverage, ensuring that every inch of your walls receives the same amount of paint.
- Versatility: Paint sprayers can be used for various projects beyond interior walls, such as ceilings, doors, and furniture.
B. Gaining Confidence with Practice
Like any skill, achieving proficiency with a paint sprayer takes practice. Your first project may not be perfect, but with each new endeavor, you’ll become more skilled and confident. Don’t hesitate to experiment on scrap surfaces before tackling more prominent areas.
C. Encouragement for DIY Enthusiasts
Embracing DIY projects, such as interior painting, can be rewarding and cost-effective. It allows you to personalize your living space and take pride in the improvements you’ve made. As you stand back and admire your freshly painted room, remember that you have the skills and knowledge to take on future DIY projects with confidence.
In closing, interior painting with a sprayer is a versatile and efficient method that empowers you to transform your home. With the guidance and tips provided in this guide, you’ve gained valuable insights into the process. As you take the final step of enjoying your newly painted space, you can relish in the sense of accomplishment that comes with a job well done. Whether you’re a seasoned DIY enthusiast or a first-time painter, the art of interior painting with a sprayer is a skill that can be honed over time, allowing you to continually improve and beautify your living environment. Happy painting!